Print a message


 How to Print a Text Message Conversation
Sometimes a text message conversation is so important that you might need a paper copy to keep in a safe place. Here’s how to print out text message conversations so that you’ll always have a physical copy available in case of emergency.
In case you have a text message conversation with someone that’s very important, it’s always a good idea to keep a backup of it so that you’ll have it on record whenever you need it. Even if you back up these text messages to your computer, it’s always a good idea to keep them backed up somewhere else as well.
With that said, having a physical, printed-out copy of an important text message conversation is great to have. Let say you where texting someone about something that could prove useful in court during a hearing, or you just want to save the last text messages you received from a friend who passed away–it’s never a bad idea to print them out and keep them safe somewhere.
Using  Google Cloud Print
If you have a printer that supports  Google Cloud Print on Android devices, then you can print out your text message conversations right from your device. If you’re not sure if your printer supports this features check here .

Using Google Cloud Print, you can print directly from your Android device to your printer if it supports Google Cloud Print, but there’s a bit more to do to get it working. This guidedoes a good job of explaining your options if you’re on Android.

In a nutshell, you’ll need the Cloud Print app installed on your phone if it isn’t already. More than likely, though, it’s already installed by default and comes stock with your device, but if not, simply download it from the Google Play Store.
After that, there are several ways you can print from your device, either by saving it to a .PDF file to Google Drive and then printing it out, using a brand-specific app for your printer from HP, Epson, etc., or printing directly to your printer if it’s connected to your home network.

Printing the Old-Fashioned Way
If you have basic printer that doesn’t support Google Cloud Print, then you’ll need to perform a couple of extra steps.
You’ll still need to screenshot the text message conversation, only this time you’ll also need to send those screenshots to your computer. There are a lot of different ways you can do that.
One method that works on  Android is to simply email the screenshots to yourself. In Android, you can do this by selecting the screenshots in your photos app and hitting the share button. From there, select Gmail and send the screenshots to your own email address. You could also save them to your Dropbox, Google Drive, or other cloud service and access them from your computer.


Once these screenshots are on your computer, you can print them out like you would with any other document. Personally, I like to open up photos in Photoshop or some other editing software and fine-tune the printing settings for the images, you can simply just send the photos to print without any preparation and they should print out just fine.

How to shutdown a windows pc

Shut Down a Windows PC Without Installing Updates

One of the most frustrating things that can happen to you when you are using your Laptop and you are in a haste to go. Then you decide to shut down your laptop, but Windows insists on updating. Twelve minutes later, you’re still waiting for Windows to update and you’re going to be late.
There is a way around this: a way to can shut down immediately even when there are updates waiting to install.

Here’s the simplest method: make sure the desktop has focus by clicking any empty area of the desktop or pressing Windows+D on your keyboard. Then, press Alt+F4 to access the Shut Down Windows dialog box. To shut down without installing updates, select “Shut down” from the drop-down list.

Then, click “OK” to shut down your PC immediately.

You can also shut down your PC immediately from the login screen. Press Windows+L to lock the screen, or log out. Then, in the lower-right corner of the login screen, click the power button and select “Shut down” from the popup menu. The PC will shut down without installing updates.

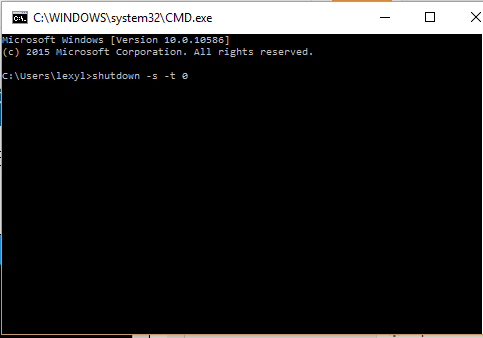
Lastly, if you need do do this from a script, you run the following shutdown command in a Command Prompt window. Type the following command at the prompt and press Enter. The last character is a zero.
shutdown -s -t 0
Your PC will shut down immediately without installing updates.

Speed up Slow PC

Speed Up Your PC 

A sluggish PC can be a user worst nightmare, with Booting up your Windows PC taking longer than usual, right clicking on an icon take up to minutes instead of seconds. Below is how you can fix this

Manage your Startup Programs.
By simply managing your start up programs and services, you can speed up your PC performance considerably. This adjustment should affect booting up your CPU access time and your internet speed. Following the steps below to speed up computer access time by micromanaging your startup programs and services.

1. Open your Start menu
2. Click Run
3. In the command screen type "msconfig.exe"
4. In the "system configuration utility",
click either "service" or "startup" tab
5. Uncheck all programs that your are no longer using.
6. Click "OK"


Dont know which process or program do what? To find out more about the what each process and program does on your PC. Visit the Processlibrary.com

Here is a list of programs and services you don’t need unless your are running a network. They are safe to remove from your startup configuration. The removal of these features will speed up your PC during the startup
Unnecessary for Startup
Alerter
Clipbook
Computer Browser
Fast User Switching
Human Interface Access Devices
Indexing Service (Slows the hard drive down)
Messenger
Net Logon (unnecessary unless networked on a Domain)
Netmeeting Remote Desktop Sharing (disabled for extra security)
Remote Desktop Help Session Manager (disabled for extra security)
Remote Procedure Call Locater
Remote Registry (disabled for extra security)
Routing & Remote Access (disabled for extra security)

Server
SSDP Discovery Service (this is for the utterly pointless"Universal P'n'P", & leaves TCP Port 5000 wide open)
TCP/IP NetBIOS Helper
Telnet (disabled for extra security)
Universal Plug and Play Device Host
Upload Manager
Windows Time
Wireless Zero Configuration (for wireless networks)
Workstation

If you want a defrag software tool. A registry cleaner is a great piece of software that will perform a defrag regularly and optimize your PC for performance and speed. 

However, be careful to not uncheck any vital programs that could halt your PC startup. If this happens just simply restart your computer in "Safe Mode" and re-enable the program and services. Also remember to close all applications. Open applications are will not get defragmented


PROJECT #2:Speed Up Windows.

Clean Your Registry   Organizing and cleaning Windows registry is one of the best ways to trouble shoot a slow computer. Usually this action alone will reward you with significant increase in PC performance.
Speed Up Windows menu loading time-- Cutting down on the load time it takes for menus is one the best ways to trouble shooting a slow computer in Windows. B 

How To make menus load faster

1. Start
2. Click Run
3 .Type Regedit then click Ok
4. Find HKEY_CURRENT_USERcontrol PanelDesktop
5. Select MenuShowDelay
6. Right click and select Modify
6. Reduce the number to around 100

Speed up Application load times-- Trouble shooting a slow computer can be done by cutting down on Application load time by using a faster access variable.
1.      Click Start
2.      Click Run
  3.   Type regedit


Find this registry key:

HKEY_LOCAL_MACHINE
SYSTEM
CurrentControlSet
Control
Session Manager
Memory Management
refetchParameters


4.Change the value of EnablePrefetcher, from its default setting of which is 3 to 5,and then restart your computer.

With the above mention I bet you are now enjoying the speed and click through of your PC

All You Need To Know About USB Flash Drive


What is a USB flash drive?
A USB flash drive (UFD) is a compact portable device used to store data. It pairs a
USB (Universal Serial Bus) interface with a flash memory data storage unit. The USB
flash drive is also known as memory stick, key drive, jump drive, or simply USB drive.
The shape typically resembles a human finger or thumb, hence also the name
thumb drive.

Technically, a UFD is not a drive because the flash memory technology is purely
digital, meaning it does not contain any moving parts. Flash memory is non-volatile,
i.e. it does not need power to maintain the stored information. On the one hand,
these characteristics make flash drives less prone to physical damage and on the
other hand they are perfectly silent. The term flash indicates that blocks of data are
erased and reprogrammed in a flash, rather than deleting them one byte at a time.

What is a USB memory stick used for?
The original purpose was to transfer small amounts of data between computers, e.g.
documents or media files. But with the rapid growth of their storage capacity,
alternative ways of using these devices have opened up. People no longer just store
data on flash drives, they also run applications from them, enhance the
performance of their operating system, or boot an entire operating system from the
stick. UFDs can be powerful tools if you know how to use them. This guide focuses on
how you can get the most out of your memory stick to enhance your work.

Before making a purchase, three important characteristics must be considered:
case, capacity, and transfer rate. Last but not least, the price decides which model
offers the best value.

Case:
The case should be durable, provide a hook to attach a lanyard, and most of all,
the shape should not interfere with its use! A massive thumb drive may not fit into a
USB docking station or block surrounding USB ports. Smaller devices will usually fit
anywhere. Besides, they tend to be lighter and easier to carry around.

Capacity:
The latest flash drive model from Kingston can store 256 GB. Affordable models
range from 2 to 16 GB. What size you go for depends on two factors: what is the
intended use and how much can you afford?

Transfer rate:
The transfer rate is the speed at which data can be read from and written to the
flash drive. A USB 2.0 interface should not limit the performance of your flash drive
because it offers more bandwidth than a flash drive can use: up to 60 Mbyte/s (480
Mbit/s). If your computer is fairly old and only supports USB 1.0, you won?t have to
worry about transfer rates. USB 1.0 only does 1.5 Mbyte/s (12 Mbit/s), which is way
below the average read / write speed of even a low performance flash drive.
The read speed typically is higher than the write speed. Thus the write speed is a
limiting factor, especially if you are going to work from and save to your storage
device. Read speeds go up to 34 Mbyte/s (272 Mbit/s), while write speeds reach a
maximum of 28 Mbyte/s (224 Mbit/s).

The maximum read / write speed is dictated by the type of memory. SLC (singlelevel
cell) stores only one bit of data per memory cell, while MLC (multilevel cell)
stores two bits of data per cell. This means that SLC is twice as fast as MLC, yielding
higher read / write speeds. Of course it?s also more expensive. However, it is worth
the investment because with SLC each cell can go through approximately 100,000
cycles of writing and erasing data before failing. Subsequently, SLC lasts about 10
times as long as MLC type memory. Unfortunately, SLC offers less storage space.


What type of flash drive do i need?
There are four types of flash drives: Generic,High Performance,Secure,and Durable.

Generic
Plastic case, dull design, not very fast, doesn?t come with extra features, and offers
the best price per MB. When you purchase a generic thumb drive from one of the
market leaders, you can still get a high quality product at a very low price.
This kind of thumb drive is sufficient for occasional use, especially if you only need to
transfer data of little importance or data that is always backed up on another drive.

High Performance
Flash drives that carry the label “high performance” are equipped with higherbinned
flash memory chips and better memory controllers, which enable increased
transfer speeds.
If you have a need for speed and are going to use the device on a daily basis, you
should go for high performance. It also means better quality and will last you longer
than a generic model.

Secure
Secure flash drives typically provide hardware encryption via an additional mini
processor. This way the flash drive can maintain better read and write speeds than
generic drives secured with software encryption. The Advanced Encryption
Standard (AES) can encrypt data with up to 256-bit. Access to the data is provided
only after inserting the correct password. Some models even go as far as to self
destruct, i.e. delete all data, after a wrong password was entered several times.
You should opt for a secure flash drive if you frequently deal with sensitive data.

Durable
These flash drives can have any characteristic of the above described, with one
exception: a robust design. They are made to withstand extreme conditions, for
example harsh temperatures, extreme kinetic shock, or high moisture. Durable flash
drives are typically encased in rubber or metal alloy and may also be watertight.
If you tend to carry important data on your flash drive and fear dropping it, throwing
it into the laundry, or damaging it in some other way, you might want to invest in a
durable flash drive.


Flash Drive
A flash drive is not as sensible as a hard disk, since it has no moving parts. However,
it's still a piece of computer hardware, which can break. Hence, your little storage
device should never be dropped, get wet, be exposed to extreme heat, or be
otherwise maltreated.
Being small comes with its own risks. Like a coin, your thumb drive can disappear
quickly. Try to carry it on a lanyard around your neck or attach it to your keys. You
should in fact treat a flash drive with utmost care, like your external hard drive, and
watch it like the keys to your house.

Formatting
Per default, flash drives are formatted in FAT32. This ensures cross-platform
compatibility. However, FAT32 limits the storable file size to 4 GB. If you would like to
store larger files on your flash drive, you should reformat it to NTFS. This file system is
supported by Windows NT / 2000 and up, Mac (drivers required), and newer Linux
distributions. NTFS is not supported by embedded devices, including TVs and media
players.
If the flash drive will be used on Windows Vista and Windows 7 computers only, I
recommend using the exFAT file format. It was designed for flash drives and ensures
best performance.

Windows XP generally does not support exFAT. A flash drive formatted in exFAT
will simply not be recognized. However, installing update KB955704 (click the
link) from Microsoft will fix this issue.

Before you format, backup any data stored on the drive, including software that
came with it. Then go to > Start > Computer, right-click onto your flash drive and
select > Format… from the menu. In the > Format window select the > File system
(discussed above) and the > Allocation unit size. The latter depends on the average
file size you wish to store. The larger the files you wish to store, the larger the
allocation unit size should be. If you?re unsure, simply go with the default. Click >
Start, confirm your intend to format the flash drive, and wait until formatting has
completed.

To prevent loss of data and extend the life of your storage device, you should
never unplug your thumb drive without first ejecting it through the Windows
taskbar.

To safely remove any USB drive, close drive folders and all files stored on the device,
otherwise Windows will refuse to eject it. Go to the notification area of the taskbar
and look for the USB icon. Left-click the icon and wait for a little window to pop up.
Then click on the device you wish to eject and wait for the confirmation that it is now
safe to remove the hardware.

Should this method fail, i.e. should you receive an error message that the USB mass
storage device could not be removed, try the following steps:
1. Close the device folder and all documents or applications running on the
device.
2. Try ejecting it again.
3. Close all programs that could potentially access the device.
4. Try to eject it again.
5. If you still cannot eject it, reboot Windows and remove the flash drive after
you were logged off.
6. If the issue persists, check whether any installed software on the device
continues to connect to Windows. This could be a portable security or
backup software installed on the device. Check with the software
manufacturer whether this problem is known and how it can be stopped.

Backup and Synchronize Your Files
Essentially, syncing and backing up files is the same. While a backup generally just
works one way, i.e. files on storage device A are copied to storage device B,
syncing can work both ways. Syncing provides more flexibility, as you can select
various settings to copy files just the way you need it.
If you always want to work with the latest versions of your files, no matter which
computer you're currently using, that's when you should sync your files. And if you
never want to lose your files due to a hardware failure, you should always have a
backup. What if you could use just one tool to achieve both?
There are many free tools to backup and sync your files.
*SyncToy

http://www.microsoft.com/download/en/details.aspx?id=15...

Never Forget Your Flash Drive
If you are working on a public computer, your laptop, or an office computer, don't forget your flash drive when you shut down the computer.
*FlashRecall Free (Never Forget Your USB Flash Drive Again)
http://www.byteboosters.org/flashrecall/index.htm

Encrypt and Password Protect Your Data
In the light of identity theft and stolen data, it is incredibly important to encrypt your
flash drive. In case your flash drive is lost or stolen, it will prevent or at least make
unauthorized access very difficult.
*Truecrypt
http://www.truecrypt.org/

Use Your Thumb Drive to Lock Your PC
Imagine you wouldn?t have to remember a password to efficiently lock your PC.
Instead you had a physical key. Your USB drive can work as a key to lock your
computer.
*PREDATOR PC LOCK Free Edition
http://www.montpellier-informatique.com/predator/en/ind...

Securely Wipe Data From Your Flash Drive
Your USB flash drive may be a temporary tool provided by your employer. Before you
return it, you should thoroughly wipe all data from it. You can of course format the
drive several times. However, it's more secure to use a tool that will overwrite the
deleted files several times. Besides, these tools will allow you to remove only specific
files, while others are left untouched. This will raise less suspicion.
*Disk Redactor Free Edition
http://www.cezeo.com/products/disk-redactor/

Did you know you could increase the system performance of your computer with
the help of a USB thumb drive? You can allocate storage space from your flash drive
to the system for times when your RAM (physical memory) is used to its capacity.
Rather than stashing data on a slow hard drive, Windows can use the much faster
flash memory to read / write data (virtual memory) and free up RAM. This will
considerably enhance the responsiveness of your system.

Windows Vista and Windows 7
The feature is called ReadyBoost. You can access it through the properties menu of
your thumb drive. Go to > Start > Computer and scroll down to > Devices with
Removable Storage. Now right-click onto your thumb drive and select > Properties
from the menu.In the properties window, switch to the > ReadyBoost tab. Here you can either
dedicate the entire device to ReadyBoost or just reserve some space for system
speed. Click > Apply to save the changes and wait as ReadyBoost configures your
cache.

Not all flash drives have the required performance characteristics to work
with ReadyBoost. You will see a respective message if that is the case.

Windows XP
With a slightly different method, you can achieve the same system enhancement in
Windows XP. Here is a brief walkthrough.
Go to > Start and right-click on > My Computer. Select > Properties and switch to the
> Advanced tab. Under > Performance click > Settings… switch to the > Advanced
tab and click > Change…
This last window lists your entire virtual memory. This is where you can allocate
additional space. Select your thumb drive and click > Custom size. Take the number
listed under > Space available and substract 5 MB. Enter the resulting number under
both > Initial size (MB): and > Maximum size (MB).Click > Set and > OK to save your changes, close all other windows, and reboot your
system. Avoid removing the thumb drive to prevent damage.

Windows XP supports a maximum of 4096 MB in additional virtual memory.

A flash drive can be a simple vehicle to transfer data from one computer to
another. With the right tools, however, it can transform into a powerful tool. It can
help you synchronize your work between multiple computers, including your eMails
and user profiles. You can store, encrypt, and always carry important documents on
it, and you can use your memory stick to lock your computer. It?s possible to install
and run applications from a thumb drive. Finally, when your computer slows down
because it needs more RAM, you can extend the virtual memory to your flash drive
and speed up your system.


******* How to use a USB flash drive *******
http://www.wikihow.com/Use-a-USB-Flash-Drive
http://www.ehow.com/how_4778497_use-usb-flash-drive.htm...


USB 3.0 [SuperSpeed]

http://en.wikipedia.org/wiki/USB_3.0
http://www.usb.org/developers/ssusb
http://www.anandtech.com/show/4523/usb-30-flash-drive-r...
http://www.everythingusb.com/superspeed-usb.html
http://www.pcworld.com/article/186566/usb_30_finally_ar...

*Portable Apps for your Flash Drive can found in the links below:
http://www.tomshardware.com/forum/242173-49-free-softwa...

* LibreKey
http://www.liberkey.com/en.html

* PortableApps
http://portableapps.com/


My USB Flash device is write protected

How to remove a write protection from your USB memory Stick if there is no Write protection ON or OFF button or tab:

1. Shutdown your computer or laptop
2. Insert USB Memory Stick into your laptop or Computer
3. Turn on computer and then immediately start pressing (F8) key then Advanced Boot Options screen will come up
4. Select Safe Mode with Command Prompt
5. After loading files if your USB Memory Stick drive letter is (G) for example then write as
6. C:\windows\system32>G: and press enter
7. G:\>format G: and press enter
8. If ask you (Y/N) then press (Y) and press enter
9. Now a full format will start which remove write protection from USB Memory Stick.

Always use the Safely Remove Hardware option when taking your flash drive out of the USB port.This will help prevent data loss and corruption of your flash drive.

***** How To Enable and Disable Write Protection Of USB Devices Under Windows *****
http://www.ghacks.net/2011/03/18/how-to-enable-write-pr...

***** Test for Errors and Fake USB Flash Drives – H2testw *****
http://www.softpedia.com/get/System/System-Miscellaneou...

***** How to Remove Write Protection From a USB Drive *****
http://www.ehow.com/how_4924168_remove-write-protection...

***** How to Remove Write Protection From My USB Flash Drive 2 ******
http://www.ehow.com/how_5809600_remove-protection-usb-f...

***** How to Fix Errors and Format USB Flash Drives *****
http://www.quickonlinetips.com/archives/2005/08/fix-for...

***** EjectUSB – Safe USB Ejection Tool *****
http://www.pendriveapps.com/ejectusb-safe-usb-ejection-...

***** How to Restore a Thumb Drive After Deletion *****
http://www.ehow.com/how_7275528_restore-thumb-drive-aft...

***** How to Format a USB Flash Drive *****
http://www.supermediastore.com/article/u/how-to-format-...


Note: Sometimes if you plug a thumb drive back into the USB port and use the Safely Remove Hardware option , the write protection problem will be cured.


USB Thumb Drives that don't have a write protection switch

* Turn on your computer and plug in the thumb drive after your OS has booted into windows.
* Open the My Computer window and find your USB thumb drive.
* Right click on the thumb drive and open the Properties tab. Once the options window opens up, go through the tabs until you see the remove write protection option.
* Select this option and see if that removes the write protection.


If all of the above steps do not work to remove write protection issues, then the drive is likely worn out or broken.A write protection state does occur when a drive has become defective, most often because the drive has been worn out too much. And indicative when all/most data is still there, but the user can't write or format to the drive. < Contributed by forum member psaus


http://m.bestofmedia.com/sfp/images/design/beacons/lazy.png


Software to test the speed of USB Flash \ Thumb Drives


***** CrystalDiskMark *****
http://crystalmark.info/software/CrystalDiskMark/index-...

***** HD TUNE *****
http://www.hdtune.com/

***** Check Flash *****
http://www.softpedia.com/get/System/Boot-Manager-Disk/C...

***** UsbFlashSpeed *****
http://usbflashspeed.com/

***** HD Speed *****
http://www.steelbytes.com/?mid=20


http://m.bestofmedia.com/sfp/images/design/beacons/lazy.png


Install Windows 7 from a USB flash drive
http://arstechnica.com/business/2009/12/the-usb-flash-d...
http://www.howtogeek.com/howto/9585/how-to-setup-a-usb-...
http://wintoflash.com/home/en/


Computer Has a Black Screen (BSOD)

Computer Black Screen Of Death can be frustrating Sometimes

There are two types of computer black screens that can appear in Windows. 

  • One where the computer will not boot up but you have a beep sequence sounding to let you know what the problem could be,
  • The other has nothing at all. No beeps, no cursor, no logo screen, and no choice to boot to safe mode or access the bios.
  • If your computer will not boot up and you get a beep sequence, that doesn't mean you are good to go however, it is a step in the right direction towards solving this problem. 
This is a message from your computer that can be understood by looking up your BIOS(the brand) beep code.
 For example you may have an Award Bios, Ami Bios, Phoenix BIOS, Compaq, Dell, or Acer Bios. This list goes on and on.  You can search for Bios beep codes in Google.
 Here is an example of results in Google search Search results for “bios beep codes”

If you heard a single beep, then the computer posted, and the CPU is OK. POST= Power On Self Test  is procedure the computer goes through on starting to ensure all is well.

When your computer has a black screen in windows, and absolutely nothing else, this is where the challenge begins. Sometimes the fans and the CPU seems to be running.

It would be good to have a replacement part for basically any computer component at your fingertips.  If you do not have these tools then you will need to try and find the errors manually.

Common things that can happen when your computer has a black screen in Windows:

(1). When the computer is booting up, it sound like it is booting as the CPU fan is running and the lights are on. 
It also finds the CD ROM but it won’t boot from a CD either.

(2). Sometimes when you have a computer black screen on startup and the power switch light will be green and then turns to orange or amber.
Everything seems to be running but you can’t see anything on the screen, not even a flashing cursor. Your black screen in Windows has occurred before the Windows logo screen.

Some common causes of a computer black screen in Windows:

HERE ARE SOME BASIC CAUSE AND SOLUTION

(1). Starting Windows Without Taking note of the displayed error:
If you see the screen that tells you your computer had an error, do not choose to start normally, choose to start in safe mode now. See what is safe mode. This is your chance to go the safe way. Many people rush and press to start Windows normally and sometimes this causes a serious problem.

(2). Where is your Monitor plugged in? “My PC screen is black”

The first and most obvious reason for a computer appearing to run but you cannot see the video is the monitor. A common mistake is to plug the monitor into the on-board video plug when you actually have a PCI or AGP video card installed.
 Trust me I have done this myself. Simply move the plug to the correct position. If you see two blue monitor plugs at the back of the computer or even a blue plug and a HDMI port then try using a different plug.

Obviously you should also check to see if the monitor plugged is actually in firmly. It could have been knocked out if it was not correctly positioned in the first place.

(3). Failing Display adapter or video card can cause a black screen in windows:

Most of the time you can tell if your computer video card is deteriorating by seeing little tell tale signs. Lines appearing or flashing can sometimes occur, however sometimes nothing happens at all. You might turn your computer on and have the dreaded black screen. You can try removing your video card and using onboard video, or replacing the video card to see if that is the problem.

(4). Plugged PC into a different monitor or even a TV:
 When the screen resolution is not compatible which actually gives the computer are serious black screen.

 Restart and press F8. This will take me to the the menu where you will choose enable VGA mode or something similar.

(5).The next reason the computer will not boot up is RAM…or memory:


This can be the cause when your computer has a black screen in Windows.

If your memory is not seated properly, is damaged, or even absent altogether, this can cause a black screen.
If you have no memory installed at all, some computers make no sounds and just show a black screen on startup.
When your computer gets a black screen only sometimes, it usually means your ram is on the way out For example if you boot your computer and it doesn’t work, then go back an hour later, and it does work, your memory is playing up. 

You can try taking the ram out, gently cleaning it with an antistatic cloth, and replacing it. This may solve your problem. If it does not, then you should try running your computer with another compatible stick of ram installed.

(6). Black screen on startup with an amber flashing light
A flashing amber light along with your black screen on startup can be a few things.

  • Not enough power getting to the motherboard.
  • A dead power supply.
  • A bent pin or shorted out USB port causing a problem.
  • Computer black screen after installing new hardware
Often when computer users install hardware in order to upgrade their own computers they run into problems. If you have just performed an upgrade and then get a black screen, the answer is obvious.
Some hardware components may not be compatible with the others in your system. And of course there is always the risk of static electricity damaging your components when you are not an experienced computer repair person.

You might just be installing a new piece of RAM but the best way to troubleshoot this is to go back to where you started from. Always start from the beginning. If your computer was working and you installed something, then take it back out. Think about what you are doing and try again.

This has nothing to with getting a black screen in Windows, as sometimes you have not even installed Windows yet. The hardware must be compatible together and also must be installed correctly.

(7). Leaving a bootable usb flash drive connected to your computer

Yes this can confuse your computer and it won’t know where to boot up. When your computer has a black screen on startup from doing this and you realize this is the problem and remove the USB, the computer just continues to boot normally..this sometimes happens because a computer sometimes recognizes a USB as a CD drive and tries to boot to it. This is the easiest cause of a black screen in Windows as you can simply just take it out and restart your computer.

keyboard. This is why having a black screen in Windows as a crazy amount of causes and solutions. I really did not expect this one to come out of the woodwork.

Corrupted User Account 

If you have logged into Windows, so you actually saw the login screen, then logged into Windows, this can mean a few different things. One is that it can be a corrupted user account. In this case it would be handy to have another user account to login to. Then you would be able to tell straight away if that was the problem or not. If you can log into another account you will be able to access the corrupted user account through the main hard drive which is usually called C: drive. You will see a folder called “users” and then there will be another folder for the actual username.

If your computer has black screen but you can see one small flashing cursor, I see this as a good sign! It usually means your computer is ok to be formatted. It can also mean that you should try to repair the boot sector first. 

How to repair a damaged boot sector.
Simply Insert your Bootable disc or drive then boot from that disc / drive once it load the interface simply choose the "Repair option"

There are many other reason you can have a Black Screen Of Death on Your PC, above are the common cause. “Happy DIY”

(8). Corrupting the Boot Sector:

A black screen on startup can be of so many things! I have learned this lesson the hard way. Never turn off the computer when it is half way through the boot procedure. Even when it is taking forever, or having a major problem you must let it run through if possible. Interrupting it once may be ok, but twice or three times is a no no. After you have carelessly restarted and shutdown a few times the black screen may appear. But this time it may be beyond repair for the average computer user.

Here are some other cause: 

Your CPU is not correctly seated
If your computer has a black screen after transporting one place to another, this is the first place I look. Transporting a working computer, and then not working with a black screen = dislodging the CPU. You can fix this easily by removing the CPU fan and carefully replacing it back in its spot. You may also have to replace some thermal paste between the cpu and heat sink as it stops the cpu from overheating. Be very careful not to bend any pins when dealing with your computer CPU.

Keyboard Faulty
This one surprised me because when there is a problem with the keyboard the computer still boots and says that there is no keyboard detected on the screen. Well this didn’t happen for me. I had a keyboard with a bent pin on the cable, so when it was plugged into the computer, it just plugged in normally. Then the computer black screen on startup appeared, you could here it starting up but no posting beeps, no display, nothing. I even swapped monitors around until finally I tested the keyboard and found the bent pin. I never thought to look there because of the usual default message that appears on the screen when there is something wrong with your 
keyboard. This is why having a black screen in Windows as a crazy amount of causes and solutions. I really did not expect this one to come out of the woodwork.

Corrupted User Account 
If you have logged into Windows, so you actually saw the login screen, then logged into Windows, this can mean a few different things. One is that it can be a corrupted user account. In this case it would be handy to have another user account to login to. Then you would be able to tell straight away if that was the problem or not. If you can log into another account you will be able to access the corrupted user account through the main hard drive which is usually called C: drive. You will see a folder called “users” and then there will be another folder for the actual username.

If your computer has black screen but you can see one small flashing cursor, I see this as a good sign! It usually means your computer is ok to be formatted. It can also mean that you should try to repair the boot sector first. 

How to repair a damaged boot sector.
Simply Insert your Bootable disc or drive then boot from that disc / drive once it load the interface simply choose the "Repair option"

There are many other reason you can have a Black Screen Of Death on Your PC, above are the common cause. “Happy DIY”